Difference Between First Angle Projection and Third Angle Projection: The difference between first angle projection and third angle projection is one of the significant concepts in the world of engineering drawing. Three-dimensional objects can be depicted in two dimensions using an orthographic projection technique. To accurately portray objects, it is employed in engineering and technical drawing. In this article, we will dive deep into this realm and understand the difference between first angle projection and third angle projection in a detailed manner so that students can have a crystal clear understanding of this subject.
Difference Between First Angle Projection and Third Angle Projection
The major difference between first angle projection and third angle projection lies in the relative positioning of the object using orthographic projection system. To depict a 3D object in a 2D plane, the orthographic projection technique is utilized. The orthographic projection technology projects views of 3D objects onto a 2D plane using parallel lines. To represent a projection view of a 3D object on a 2D plane in accordance with the orthographic projection rule, the horizontal plane in a rotated in a clockwise direction. Let us explore the difference between first angle projection and third angle projection by understanding its various aspects. This difference can be better understood through the diagram given below.
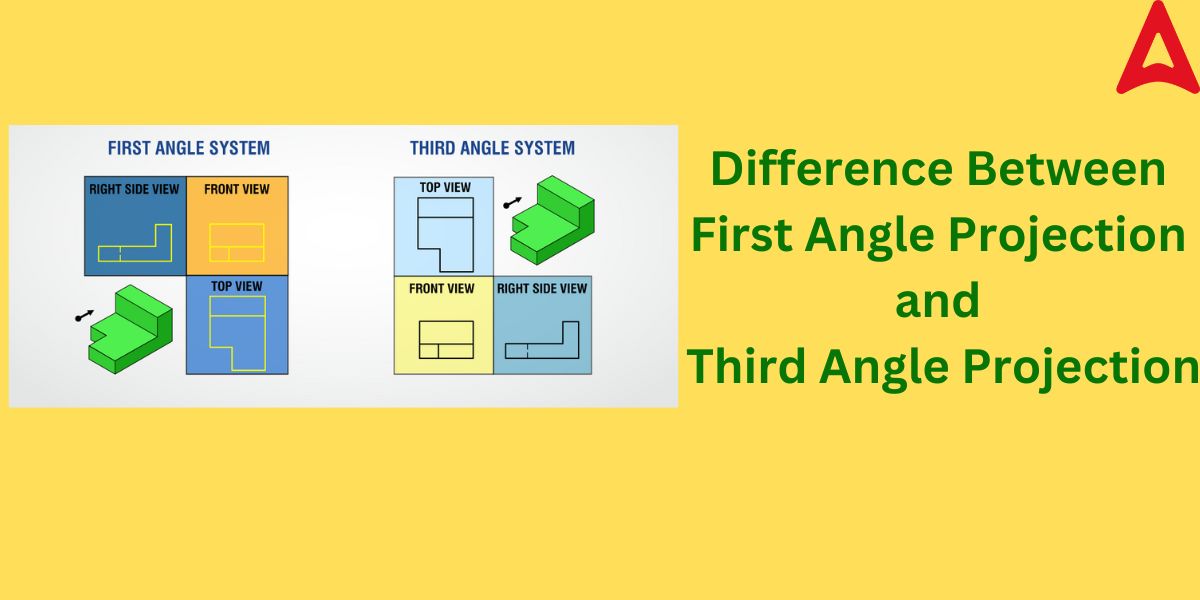
Difference Between First Angle Projection and Third Angle Projection Definition
Before understanding the difference between first angle projection and third angle projection, one must understand the technicalities behind these angle of projections. Basically there are two types of orthographic projection systems: first angle projection and third angle projection. Let us understand these projection types in detail.
Meaning of First Angle Projection
The object is seen in the first quadrant according to the First Angle Projection system. An object can be positioned at the front of the vertical and horizontal planes as well as on top of them. In India and several European nations, the first angle projection is primarily used. It positions the object in front of the projection planes and facing the viewer. In the initial angle projection, you can assume that the projection plane is solid. Onto planes that are situated between the observer and the object, the orthographic views are projected. The planes are set up in the following order: the object, the observer, and the projection plane.
Meaning of Third Angle Projection
In the third angle projection system, the object is imagined to be placed in the third quadrant, hence the name third angle projection. In this projection system, an object can be positioned behind the vertical planes and at the bottom of the horizontal plane. In the United States, the first angle projection is usually used. By doing this, the object is positioned between the observer and the object. In the third angle projection, you can assume that the projection plane is transparent. Onto planes that are behind the observer-concerned object, orthographic views are projected. The planes are arranged in this way: projection plane first, then object, then observer.
The facts stated above will give you a good idea about the difference between first angle projection and third angle projection.
Difference Between First Angle Projection and Third Angle Projection Views
As we know that the engineering drawing focuses on the concept of views in a very detailed manner. The six orthographic views—Top, Bottom, Right, Left, Front, and Back views—also referred to as the six principle views—constitute a set of 2D drawings that can be used to represent a 3D object in orthographic projection. The three views that are most frequently employed are the front, right side, and top views. The difference between first angle projection and third angle projection can be best understood through their views. The diagrammatic representation of their views is given below.
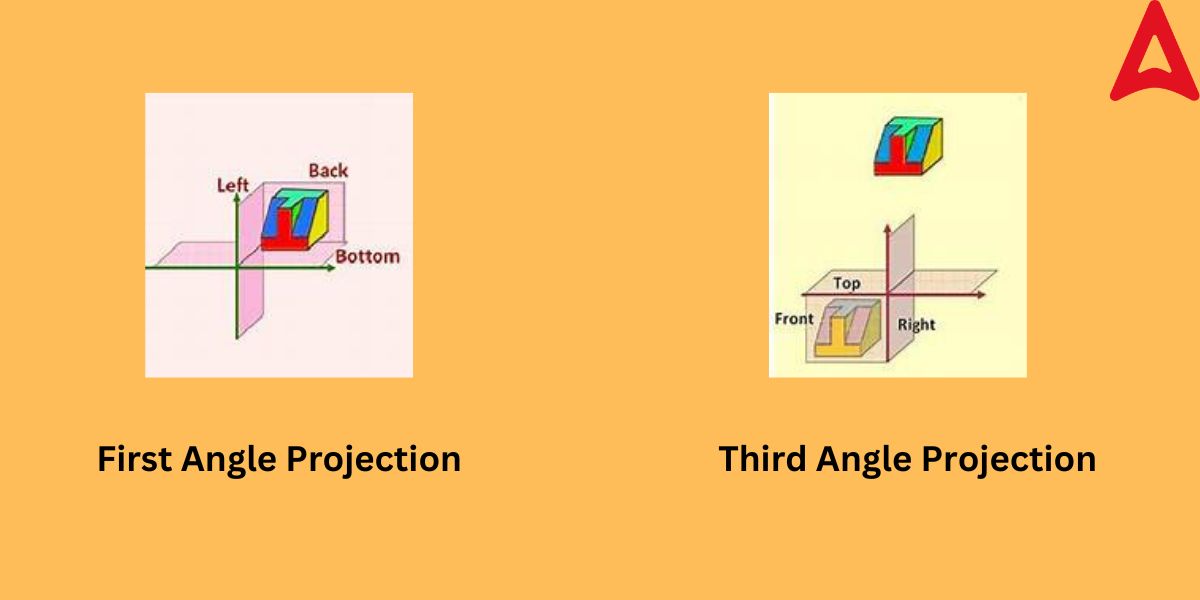
As you can observe from the above figure, in the first angle projection, the object is located in the first quadrant and in the third angle projection, the object is located in the third quadrant.
Difference Between First Angle Projection and Third Angle Projection- Symbol
Different symbols are used to represent these two orthographic projection methods. The symbol representation helps in better communication among engineers around the world, where the projection system used may differ. The difference between first angle projection and third angle projection symbols are illustrated hereunder through a diagram.
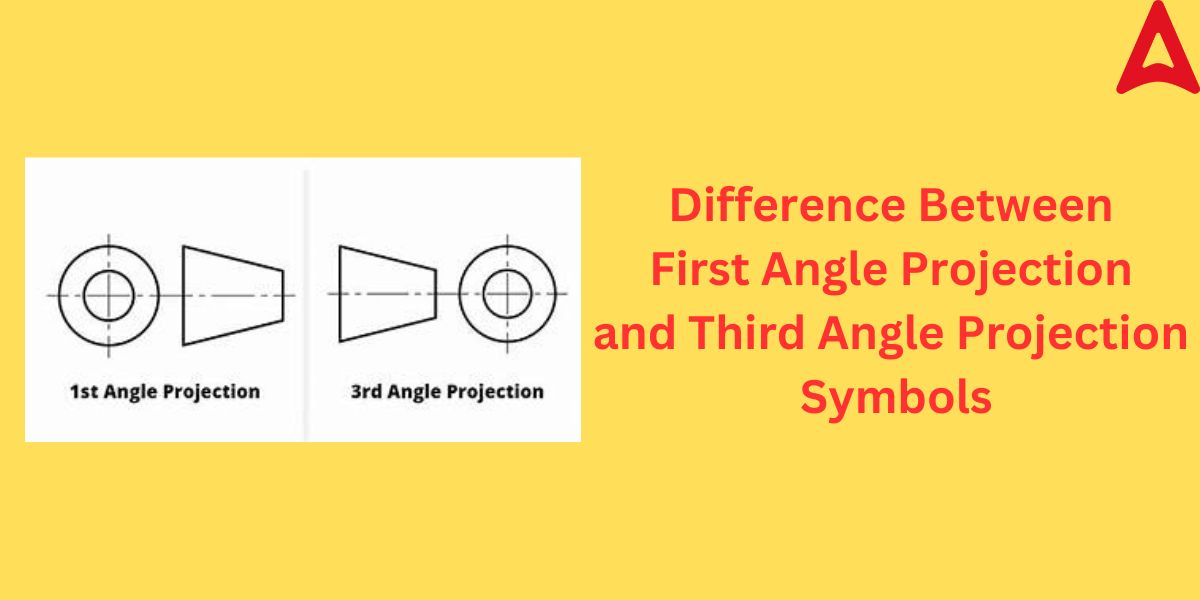
Difference Between First Angle Projection and Third Angle Projection
Applications of First Angle Projection and Third Angle Projection
While third angle projection is frequently utilized in the United States, first angle projection is frequently used in Europe and India. In North America, drafters and engineers are educated to use the third angle projection technique to read and generate drawings. The use and interpretation of drawings created using the first angle projection technique are common among professionals in Europe and Asia. Which projection technique to select, however, is not governed by any strict guidelines. Being consistent and using the same projection technique throughout a drawing is crucial. These applications help to understand one of the major difference between first angle projection and third angle projection.
Difference Between First Angle Projection and Third Angle Projection in Tabular Form
After learning all the aspects of these projection types, let us understand the difference between first angle projection and third angle projection in tabular form.
| S. No. | Criteria | First Angle Projection | Third Angle Projection |
| 1 | Object Position | The object is situated in the 1st quadrant | The object is situated in the 3rd quadrant |
| 2 | Object Placement | The object is placed between the plane of projection and the observer | The plane of projection is placed between the object and the observer |
| 3 | Projection Plane Nature | The plane of projection is assumed to be opaque (solid) | The plane of projection is assumed to be transparent |
| 4 | View Sequence | The view sequence are in the order: top left, then clockwise, Right view, Front view, and Top view. | In this projection type, the right view is located on the front view’s right side, while the top view is located at the top of the front view. |
| 5 | Top View | located at the bottom of the horizontal axis | located at the top of the horizontal axis |
| 6 | Front View | located at the top of the horizontal axis | located at the bottom of the horizontal axis |
| 7 | Left View | located at the right side of the vertical axis | located at the left side of the vertical axis |
| 8 | Right View | located at the left side of the vertical axis | located at the right side of the vertical axis |
| 9 | Usability | primarily used in Europe, Asia, Canada | primarily used in Australia and US |
The above-mentioned information sums up the difference between first angle projection and third angle projection.

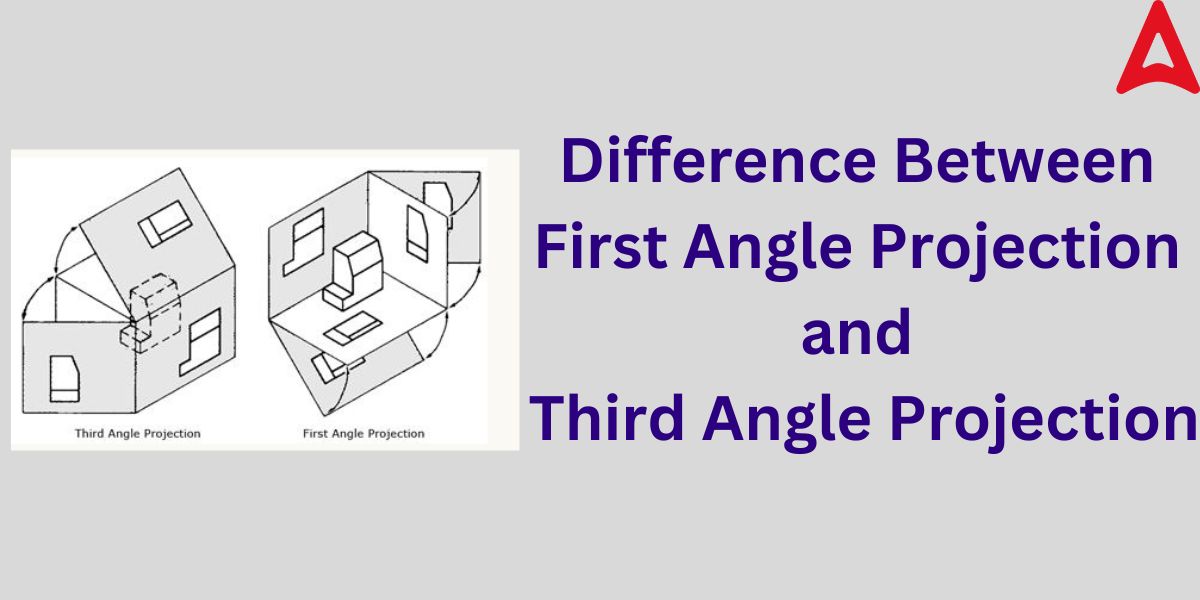


 Physics Investigatory Project Class 12 T...
 CBSE Class 12 Physics Viva Questions wit...
 Trigonometry Notes for NEET, Download PD...


