Table of Contents
Simple Electric Motor Project
Simple Electric Motor project for class 10: Are you worried about your class 10 Science project? Then your worry is now over. you are at the right place. One of the most popular science projects is building a Simple Electric Motor. In this article, we have provided how you easily build a simple Electric Motor for your class 10 project. To form a Simple Electric Motor, what are materials required? Steps all are given in the article.
Simple Electric Motor project: Are you worried about your class 10 Science project? Here we have provided how you easily build a simple Electric Motor for your project
What is a Simple Electric Motor?
Simple electric motors are used to convert electricity into mechanical energy. Electric motors are used in everything, including your computer’s cooling fans and hard drives. It’s a lot of fun to watch your creation spin and a superb way to learn how DC electric motors operate. In our houses, we use water pumps to transfer water from one floor to another, but most of us don’t know how it works. Let’s understand the Simple electric motor’s working process through its creation.
Simple Electric Motor Parts
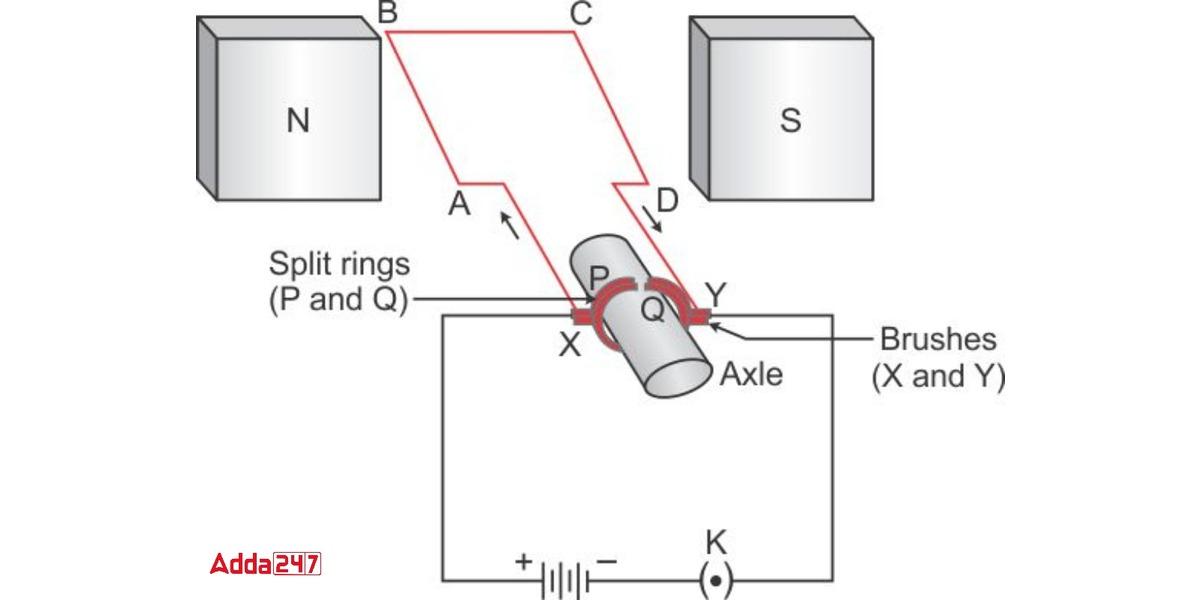
The following components make up a Simple electric motor:
- A power source for a basic motor that is primarily DC
- An electromagnet or a permanent magnet could be a field magnet.
- Axle
- Brushing
- Commutator
- Armature or Rotor
Simple Electric Motor Explained: Working Principle for the Project
In a Simple electric motor, electrical energy is transformed into mechanical energy.
Simple electric motors (dc motors) operate on the principle that mechanical energy can be created when an electric current is carried through a conductor that is generally placed in a magnetic field. As a result of this force acting on the conductor, the conductor starts to move.
Simple Electric Motor Diagram

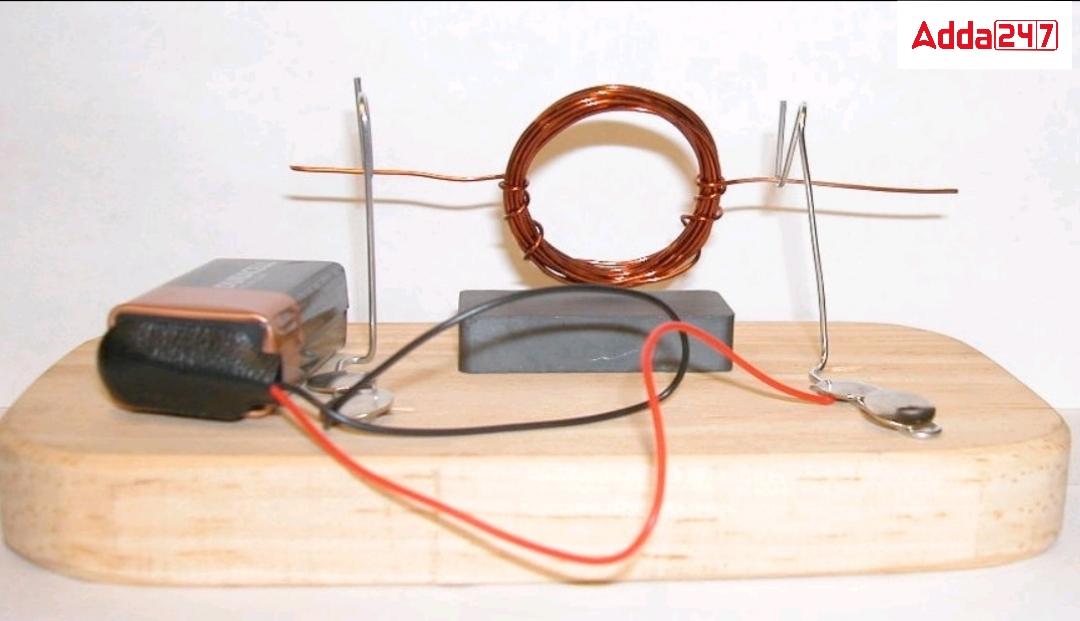
Simple Electric Motor Materials
To form a Simple Electric Motor, the following material is required. These materials are easily available in the market. the total cost of purchasing these Simple Electric Motor Materials in between 250-400 Rupees.
- D batteries
- Insulated 22G wire
- Simple circular magnet
- A wooden surface
- Screws
- Two safety pins
- sculpting clay
- electronic tape
- hobby blade
- thin marker
Simple Electric Motor Steps for Class 10 Students
Once you manage to arrange the above list of materials for making a simple electric Motor. Let’s start assembling our simple Electric Motor. Follow the steps mentioned below one by one.
Step 1: Start by winding the armature, the main component of the motor. wrap the wire from the center using a cylindrical form, important to make sure the armature is round and firmly wrapped.
Step 2: Slide the coil from the cylindrical shape. Twist the free ends several times around the coil to hold it together, then turn the wires away from the loop to make the coil hold its shape permanently.
Step 3: Using the hobby knife, cut off the top half of the wire insulation from each free end of the coil while holding it against the edge of a table. On both sides, the exposed wire must face in the same direction.
Step 4: Prepare the axle supports using two safety pins bent from the center with the aid of pliers. Each loose wire coil end should be threaded through two safety pins.
Step 5: Fix the Safety pins with the wooden surface with screws in such a way that the loops are 1 inch apart and facing each other.
Step 6: Lay the D battery on the wooden surface and fix it with sculpting clay.so that the battery maintains its position.
Step 7: Connect the wires at the battery’s two ends and fix them with electrical tape.
Step 8: Connect the battery holder’s wires to the bent safety pins
Step 9: Just below the coil, place the magnet on top of the wood block. Verify that the coil can still freely spin and that it only narrowly missed the magnet.
Step 10: To start the motor, gently spin the armature. Try spinning it in the other direction if it won’t start. In one direction only will the motor spin.


 NEET MDS Admit Card 2025 (OUT) Today at ...
 UP, MP, CBSE Board Result 2025 Live Upda...
 [Live Update] NTA CUET PG Answer Key 202...


